In this post I will try to create a step by step guide to show you how to add new disk partition to a linux Ubuntu virtual machine running on a vSphere host and managed by VMware vCloud Director.
The process shouldn’t be different than a adding a disk to a virtual machine managed by vCenter Server except for the UI used to add the disk and where would you access the console if you are not using SSH to the Ubuntu virtual machine.
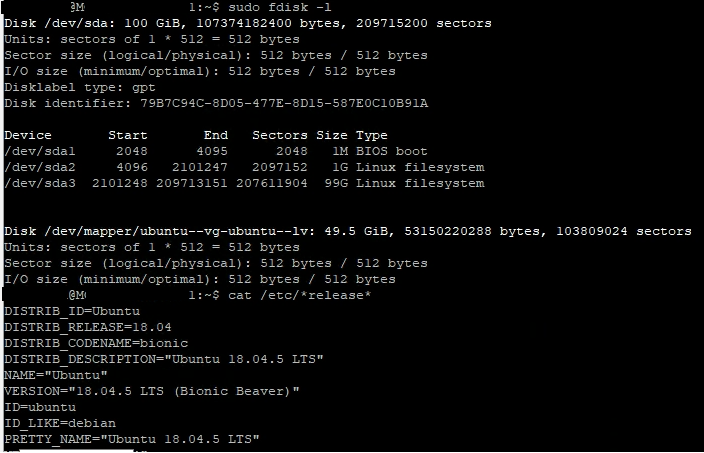
My VM is Ubuntu linux, it has a 100 GB disk. I’m using a Logical Volume which is mapped to the / directory on the VM.

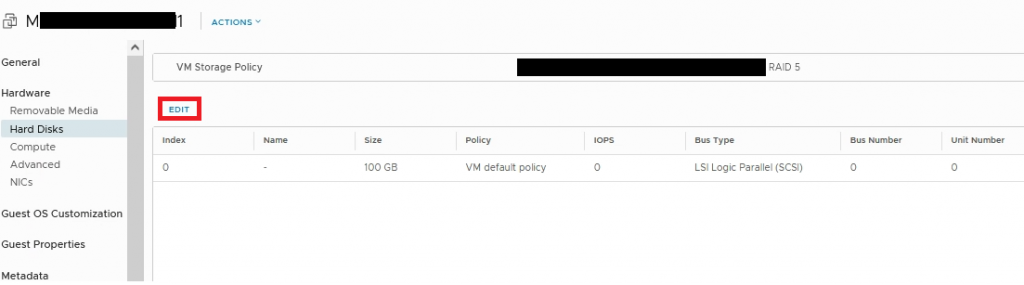
1- Add a new Disk to the VM
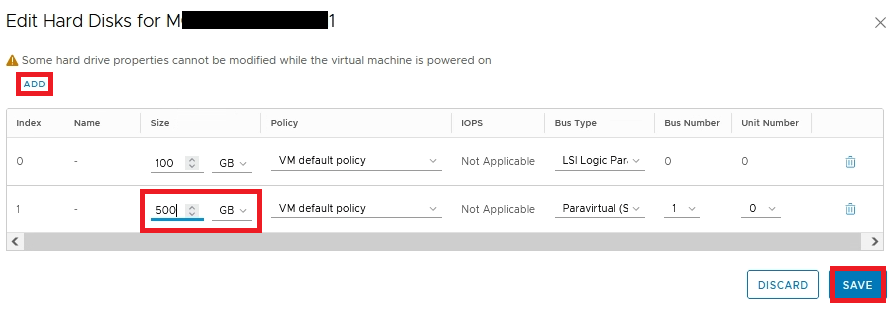
My requirement is to add a new disk partition with 500 GB to my Linux Ubuntu machine, which can be added by editing the VM disk and adding a new disk with the required space.
*this action is online and require no shut down to the VM
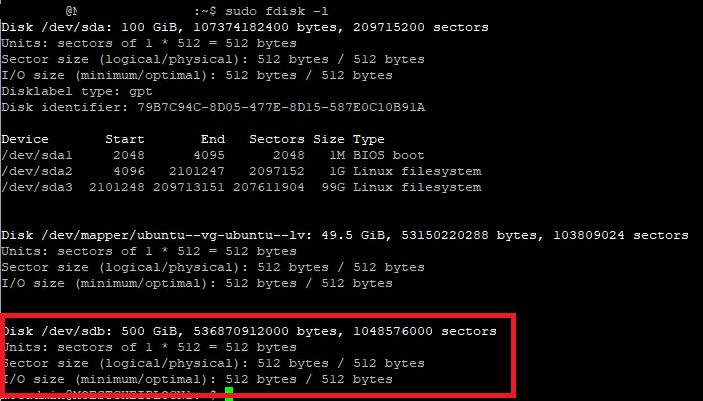
*You can list all physical disk using sudo fdisk -l.Sudo will be required for most of the commands that we will run to create disks.
Now, we’ve got two options pursue,
1- Create a new physical volume, volume group and then logical volume and map it to the new directory
2- Create the new directory and assign it to /dev/sdb
In this article I’ll just list the steps for the second option which is already explained in VMware KB 1003940
2- Create a new Partition
1- Create one partition on new disk sdb using fdiskfdisk /dev/sdb
Command (m for help): p
Command (m for help): n
Command action
e extended
p primary partition (1-4)
p
Partition number (1-4): 1
First cylinder (1-22400, default 1): <RETURN>
Using default value 1
Last cylinder or +size or +sizeM or +sizeK (1-22800, default 22800): 22400
Command (m for help): w
The partition table has been altered !
2- Create an ext3 file system on the new disk partition created on the last stepmkfs -t ext3 /dev/sdb1
Caution: Ensure you have selected the right device, there is no undo.
3- Run the fdisk command to verify the existence of the new disk partition you createdfdisk -l
4- Run this command to create a mount point for the new disk partitionmkdir /New_Directory_Name
5- Run this command to display the current content of /etc/fstabcat /etc/fstab
6- Using a text editor, edit fstab and add this line to add the disk partition to /etc/fstab so that it is available across reboots/dev/sdx1 /New_Directory_Name ext3 defaults 1 3
Note: Use a Linux text editor of your choice.
7- Restart the Linux virtual machine and the new disk partition is now available.
I’ll explain in another post the other option to create a new Volume Group and a new Logical volume which gives more flexibility to extend or add new new disks under that logical volume.
You can access part 2 from here
Written by,
Mohamed Basha

Solutions Architect, Cloud and Datacenter.